BTC Connect (Account Abstraction)
Particle Network's BTC Connect is the first account abstraction protocol for the Bitcoin ecosystem. It unifies smart accounts on Bitcoin Layer-2s and standard BTC accounts through native wallet interfaces. To achieve this, Particle Network has deployed ERC-4337 AA infrastructure natively on Bitlayer, which developers can tap into to leverage smart accounts.
BTC Connect achieves this by, firstly, allowing users to connect to your dApp with their UniSat, OKX, TokenPocket, Bybit, or Bitget wallet. Upon connecting, a smart account is generated on Bitlayer and assigned to their BTC account. This smart account can then be used and authenticated directly through their BTC wallet, providing native Bitcoin users with a simple interface to interact with applications on Bitlayer.
BTC Connect natively supports Bitlayer within its flagship SDK, @particle-network/btc-connectkit, and has been deployed on Testnet and Mainnet. This document will provide an initial introduction and step-by-step guide to working with BTC Connect on Bitlayer through this SDK.
Introduction
Throughout this page, you'll find details on installing, configuring, initializing, and completing a full integration of BTC Connect within your application on Bitlayer. Specifically, this guide will contextualize this process by building a simple create-react-app demo application. Before starting, you can find this application here.
To learn more about BTC Connect, head over to Particle Network's documentation.
Before configuring and implementing BTC Connect, you'll need to meet the following prerequisites:
- Have a project and application configured within the Particle dashboard.
- Prepare a
create-react-apporNext.jsapplication structure to integrate BTC Connect with the required dependencies installed.
Dashboard Configuration
Particle Network's dashboard acts as the central control panel for all applications that use BTC Connect or Smart Wallet-as-a-Service. To use and authenticate BTC Connect, you'll need to retrieve various keys from this dashboard, which you can be do through the following process:
- Head over to the Particle dashboard, and either login or create a new account.
- Create a new project for your application.
- After opening this project, create a web application representing your dApp.
- Finally, with an application made, copy your Project ID, Client Key, and App ID.
You'll be using these three values momentarily to configure BTC Connect. If applicable, you can save these within corresponding environment variables, such as REACT_APP_PROJECT_ID, REACT_APP_CLIENT_KEY, and REACT_APP_APP_ID.
Dependency Installation
Within your React-based application (in this example, we'll be using create-react-app), you'll need to install two key dependencies related to BTC Connect. These are:
@particle-network/btc-connectkit, the primary SDK for BTC Connect.@particle-network/chains, a collection of chain objects includingBitlayerTestnetandBitlayer.
To install these libraries, run one of the following commands within your project:
yarn add @particle-network/btc-connectkit @particle-network/chains


# OR


npm install @particle-network/btc-connectkit @particle-network/chains


# Other package managers such as pnpm would work too.
Configuring BTC Connect
BTC Connect (@particle-network/btc-connectkit) is a React-based SDK. Therefore, configuring it and preparing for integration will require the initialization of a corresponding React component, which will wrap your core application component or JSX. In this example, this will take place within index.tsx.
Within your index.tsx file (or the equivalent location for your project), import the following objects from @particle-network/btc-connectkit:
ConnectProvider, the React component used for configuration.- One, or multiple of the following wallets:
OKXConnectorUnisatConnectorBitgetConnectorTokenPocketConnectorBybitConnector
With these imported, you're ready to configure the ConnectProvider component through its options and connectors parameters. Starting with options, you'll need to define the following properties:
projectId,clientKey, andappId. These were previously retrieved from the Particle dashboard.aaOptions, which containsaccountContracts, taking:BTC, the smart account implementation you'll be leveraging.chainIds, one or multiple chains that your application will support. In this case, you can either use Bitlayer's chain ID,200810, orBitlayerTestnet.idfrom@particle-network/chains.version, the BTC smart account version you intend to use. For Bitlayer, this should be2.0.0. If you intend to use more than just Bitlayer, you may need to define another instance ofBTCusingversion1.0.0. For more information on which chains support1.0.0and which support2.0.0, head over to Particle Network's documentation.
walletOptions, which contains:visible, a Boolean determining whether or not Particle Network's embedded wallet modal will be shown after a user connects their Bitcoin wallet. If set totrue, users will have direct access to their associated smart accounts through this embedded interface. Otherwise, iffalse, developers will need to retrieve and reflect wallet information, such as balances, independently.
Once you've defined options using the parameters detailed above, you'll need to select the wallets you'd like to be supported within BTC Connect through the connectors property.
connectors is simply an array of wallet objects ( previously imported), such as OKXConnector. These should be initialized through syntax such as [new OKXConnector(), new UnisatConnector()].
Below is an example of what a configured instance of ConnectProvider typically looks like; this is demonstrated through a central index.tsx file:
import React from 'react';
import ReactDOM from 'react-dom/client';
import {
  ConnectProvider,
  OKXConnector, //
  UnisatConnector, //
  BitgetConnector, // -- Only one connector is required, although any combination of these five may be used.
  TokenPocketConnector, //
  BybitConnector //
} from '@particle-network/btc-connectkit';
import { BitlayerTestnet } from '@particle-network/chains';


// The component in which you're using BTC Connect
import App from './App';


ReactDOM.createRoot(document.getElementById('root') as HTMLElement).render(
  <React.StrictMode>
    <ConnectProvider
      options={{
        projectId: process.env.REACT_APP_PROJECT_ID, //
        clientKey: process.env.REACT_APP_CLIENT_KEY, // -- Retrieved from https://dashboard.particle.network
        appId: process.env.REACT_APP_APP_ID, //
        aaOptions: {
          accountContracts: {
            BTC: [
              {
                chainIds: [BitlayerTestnet.id],
                version: '2.0.0',
              }
            ]
          }
        },
        walletOptions: {
          visible: true
        }
      }}
      connectors={[new UnisatConnector(), new OKXConnector(), new BitgetConnector(), new TokenPocketConnector(), new BybitConnector()]}
    >
      <App />
    </ConnectProvider>
  </React.StrictMode>
)
Once ConnectProvider is configured, you're ready to implement BTC Connect through your central application component.
Application Implementation
At this point, you should have:
- Created a new project and application through the Particle dashboard.
- Installed
@particle-network/btc-connectkitand@particle-network/chains. - Configured BTC Connect through
ConnectProvider.
Now, to integrate BTC Connect, we'll do the following:
- Configure Ethers, or any other standard Web3 library (such as Web3.js) using hooks from
@particle-network/btc-connectkit. - Prepare a "Connect Wallet" button.
- Test BTC Connect by executing transactions on both Bitlayer and native Bitcoin.
Part 1: Interacting with BTC Connect through an EIP-1193 Provider
Interaction with BTC Connect can be facilitated either natively through the SDK –with functions from the useETHProvider hook, such as buildUserOp (for constructing transactions) and sendUserOp (for executing them), or through an external Web3 library such as Ethers. In this example, we'll focus on the latter.
Specifically, leveraging the user's smart account on Bitlayer through Ethers requires using BTC Connect's EIP-1193 provider object. After a user connects, this object will be populated with an EVM account instance.
To retrieve this object, you'll need to define provider from the useETHProvider hook. Using provider, an instance of Ethers (or Web3.js, viem, etc.) can be constructed, as shown below.
import { useETHProvider, useBTCProvider, useConnectModal, useConnector } from '@particle-network/btc-connectkit';
import { ethers } from 'ethers';


const App = () => {
    const { provider } = useETHProvider();

    const customProvider = new ethers.providers.Web3Provider(provider, "any");

    ...
};
This Ethers instance can be used directly for transaction construction and execution. Signatures will be pushed to the connected Bitcoin wallet directly through the means of the EIP-1193 provider.
Part 2: Facilitating Wallet Connection
Wallet connection can be implemented through one of two ways with BTC Connect:
The first method requires using BTC Connect's built-in connection modal, which contains buttons for the wallets previously defined within connectors (on ConnectProvider). Below is a screenshot of this interface.
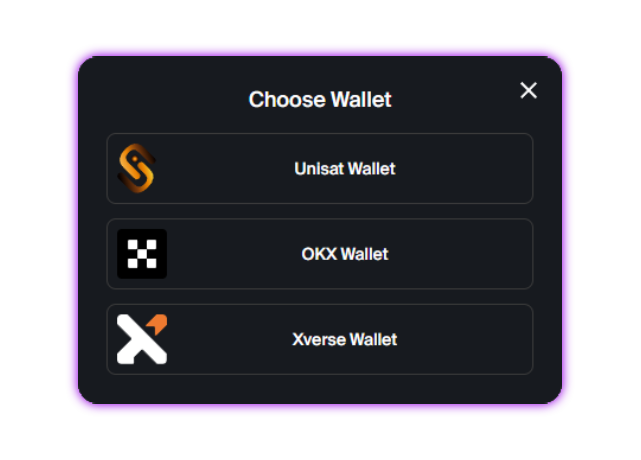
Alternatively, direct shortcuts to these wallets (independent from the above interface) can be configured in scenarios where you may want to design your own wallet connection interface.
Starting with the built-in modal, this can be opened by simply calling openConnectModal from the useConnectModal hook; upon calling, the aforementioned interface will be opened. An example of this has been included below:
import { useETHProvider, useBTCProvider, useConnectModal, useConnector } from '@particle-network/btc-connectkit';
import { ethers } from 'ethers';
import './App.css';


const App = () => {
  const { openConnectModal } = useConnectModal();

  ...

  openConnectModal();


  ...
}
For a more hands-on approach to designing your own interface, you can connect to individual wallets using the connect function from the useConnector hook. This function will simply take a string representing the wallet you'd like to connect to, such as 'unisat', as shown below.
import { useETHProvider, useBTCProvider, useConnector, useConnector } from '@particle-network/btc-connectkit';
import { ethers } from 'ethers';
import './App.css';


const App = () => {
  const { connect } = useConnector();

  ...

  connect('unisat');
  // Or 'okx', 'bybit', etc.

  ...
}
Part 3: Transaction Execution
Bitlayer (EVM)
Now that you've facilitated wallet connection and configured a corresponding Ethers object, you're ready to execute transactions on Bitlayer using the associated smart account generated from the user's Bitcoin wallet.
Using Ethers, this is done by constructing a simple transaction (using standard fields such as to, value, data, etc.) and executing it using the signer property with customProvider.getSigner().
Any transaction that can be constructed and executed through Ethers translates 1:1 within this flow.
Below is an example that burns 0.001 BTC.
const executeTxEvm = async () => {
    const signer = customProvider.getSigner();


    const tx = {
      to: "0x000000000000000000000000000000000000dEaD", // Burn address
      value: ethers.utils.parseEther('0.001'), // 0.001 BTC
      data: "0x" // Optional, only define for contract interaction or related operations
    };


    // Gasless due to usage of SendTransactonMode.Gasless within customProvider
    const txResponse = await signer.sendTransaction(tx);
    const txReceipt = await txResponse.wait();


    notification.success({
      message: "Transaction Successful",
      description: (
        <div>
          Transaction Hash: <a href={`https://testnet-scan.bitlayer.org/en-us/tx/${txReceipt.transactionHash}`} target="_blank" rel="noopener noreferrer">{txReceipt.transactionHash}</a>
        </div>
      )
    });
};
Upon executing, a signature will be requested from the connected Bitcoin wallet. This signature will directly authenticate the associated smart account on Bitlayer.
Bitcoin (L1)
Alternatively, the same wallet connection can be used to simultaneously execute transactions on native Bitcoin.
To handle this, BTC Connect has the useBTCProvider hook, containing functions such as sendBitcoin.
sendBitcoin will send a standard P2P transaction on Bitcoin, requesting a signature from the user's connected Bitcoin wallet. The snippet shown below demonstrates an example of this through a custom function, executeTxBtc.
import { useETHProvider, useBTCProvider, useConnector, useConnector } from '@particle-network/btc-connectkit';
import './App.css';


const App = () => {
    const { sendBitcoin, accounts } = useBTCProvider();

    const executeTxBtc = async () => {
        // Sends 1 satoshi back to the sender
        const hash = await sendBitcoin(accounts[0], 1);


        notification.success({
          message: 'Transaction Successful',
          description: (
            <div>
              Transaction Hash: <a href={`https://live.blockcypher.com/btc-testnet/tx/${hash}`} target="_blank" rel="noopener noreferrer">{hash}</a>
            </div>
          )
        });
      };
};
Conclusion
Through the above guide, you should now understand how to:
- Configure the Particle Network dashboard.
- Install and initialize BTC Connect (
@particle-network/btc-connectkit). - Construct a custom Ethers provider to manage the user's smart account.
- Facilitate wallet connection.
- Build and execute transactions on both Bitlayer and native Bitcoin.
To view and try a complete demo application based on the snippets shown in this guide, visit our dedicated GitHub repository.
Particle Network has extensive documentation covering the implementation of BTC Connect within applications built on Bitlayer, which can be found here.