Bridge User Guide (Testnet)
This guide walks you through using the BitVM Bridge on testnet, including:
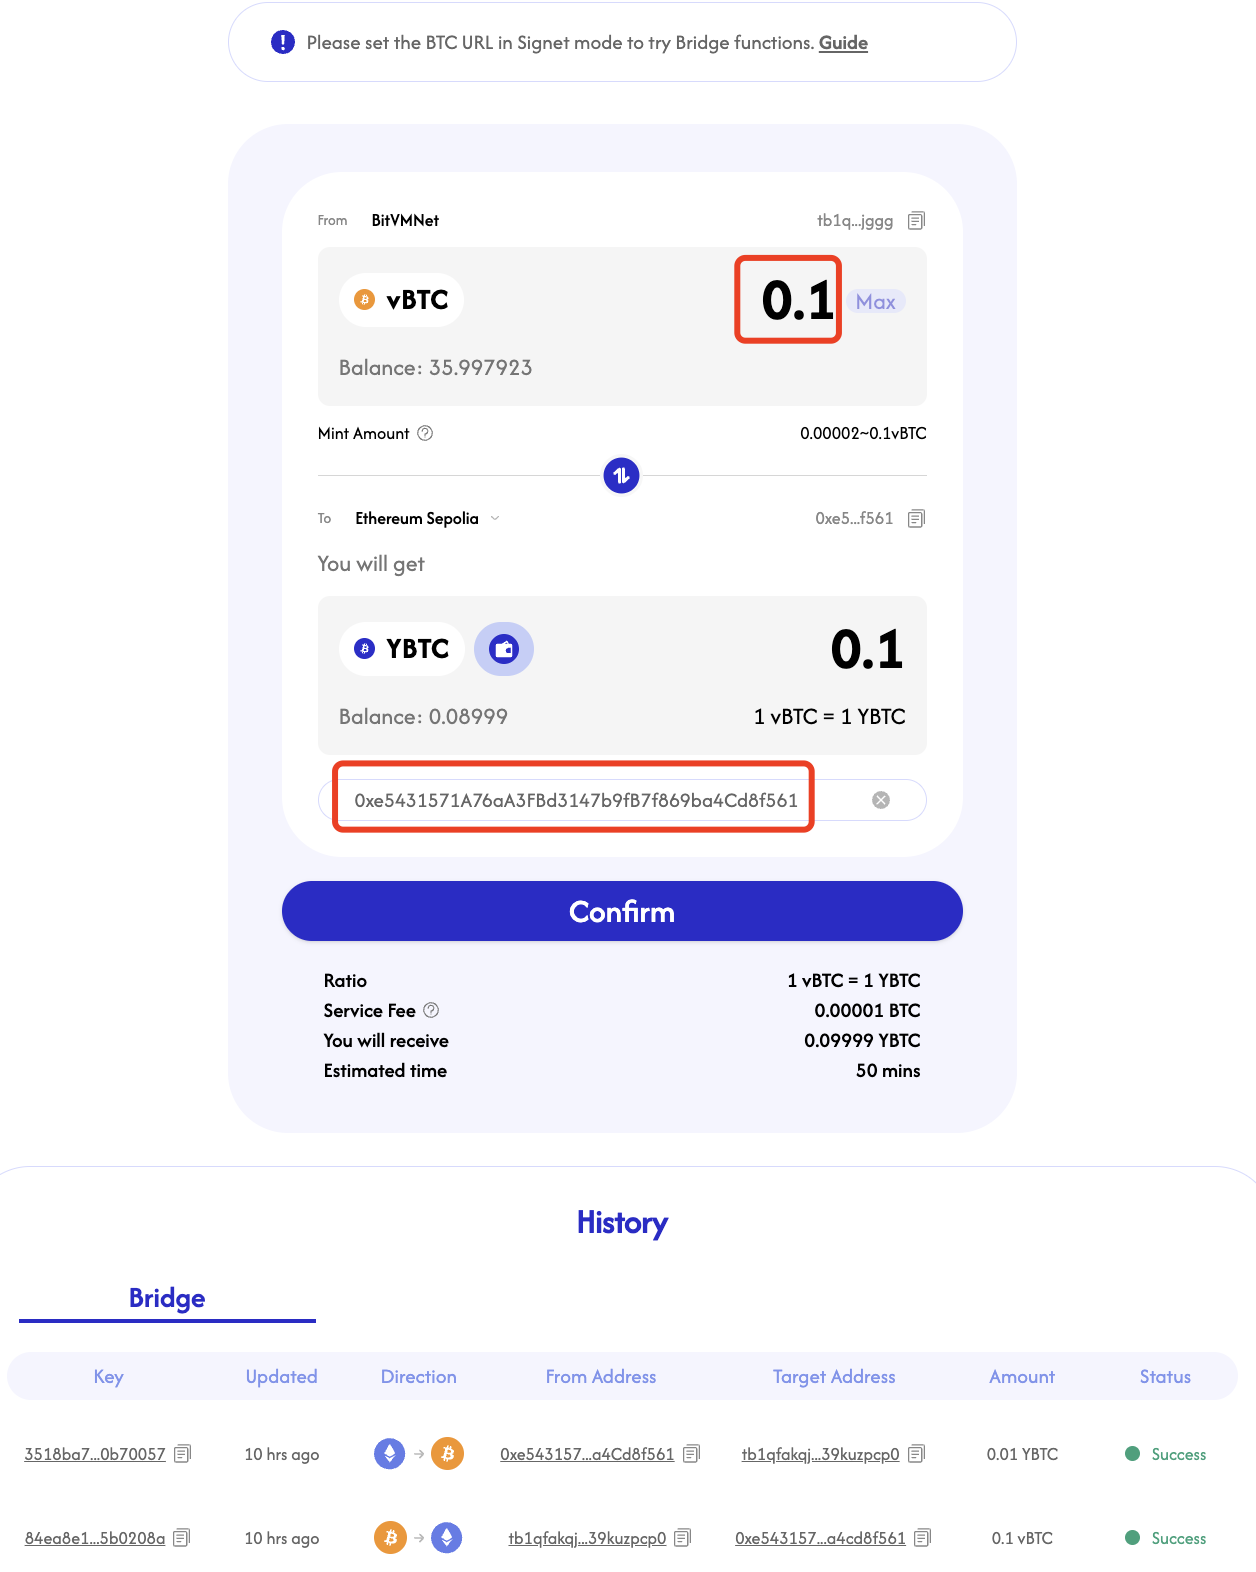
- Bridging vBTC from BitVMNet to Monad Testnet or Ethereum Sepolia to mint YBTC
- Bridging YBTC back to BitVMNet
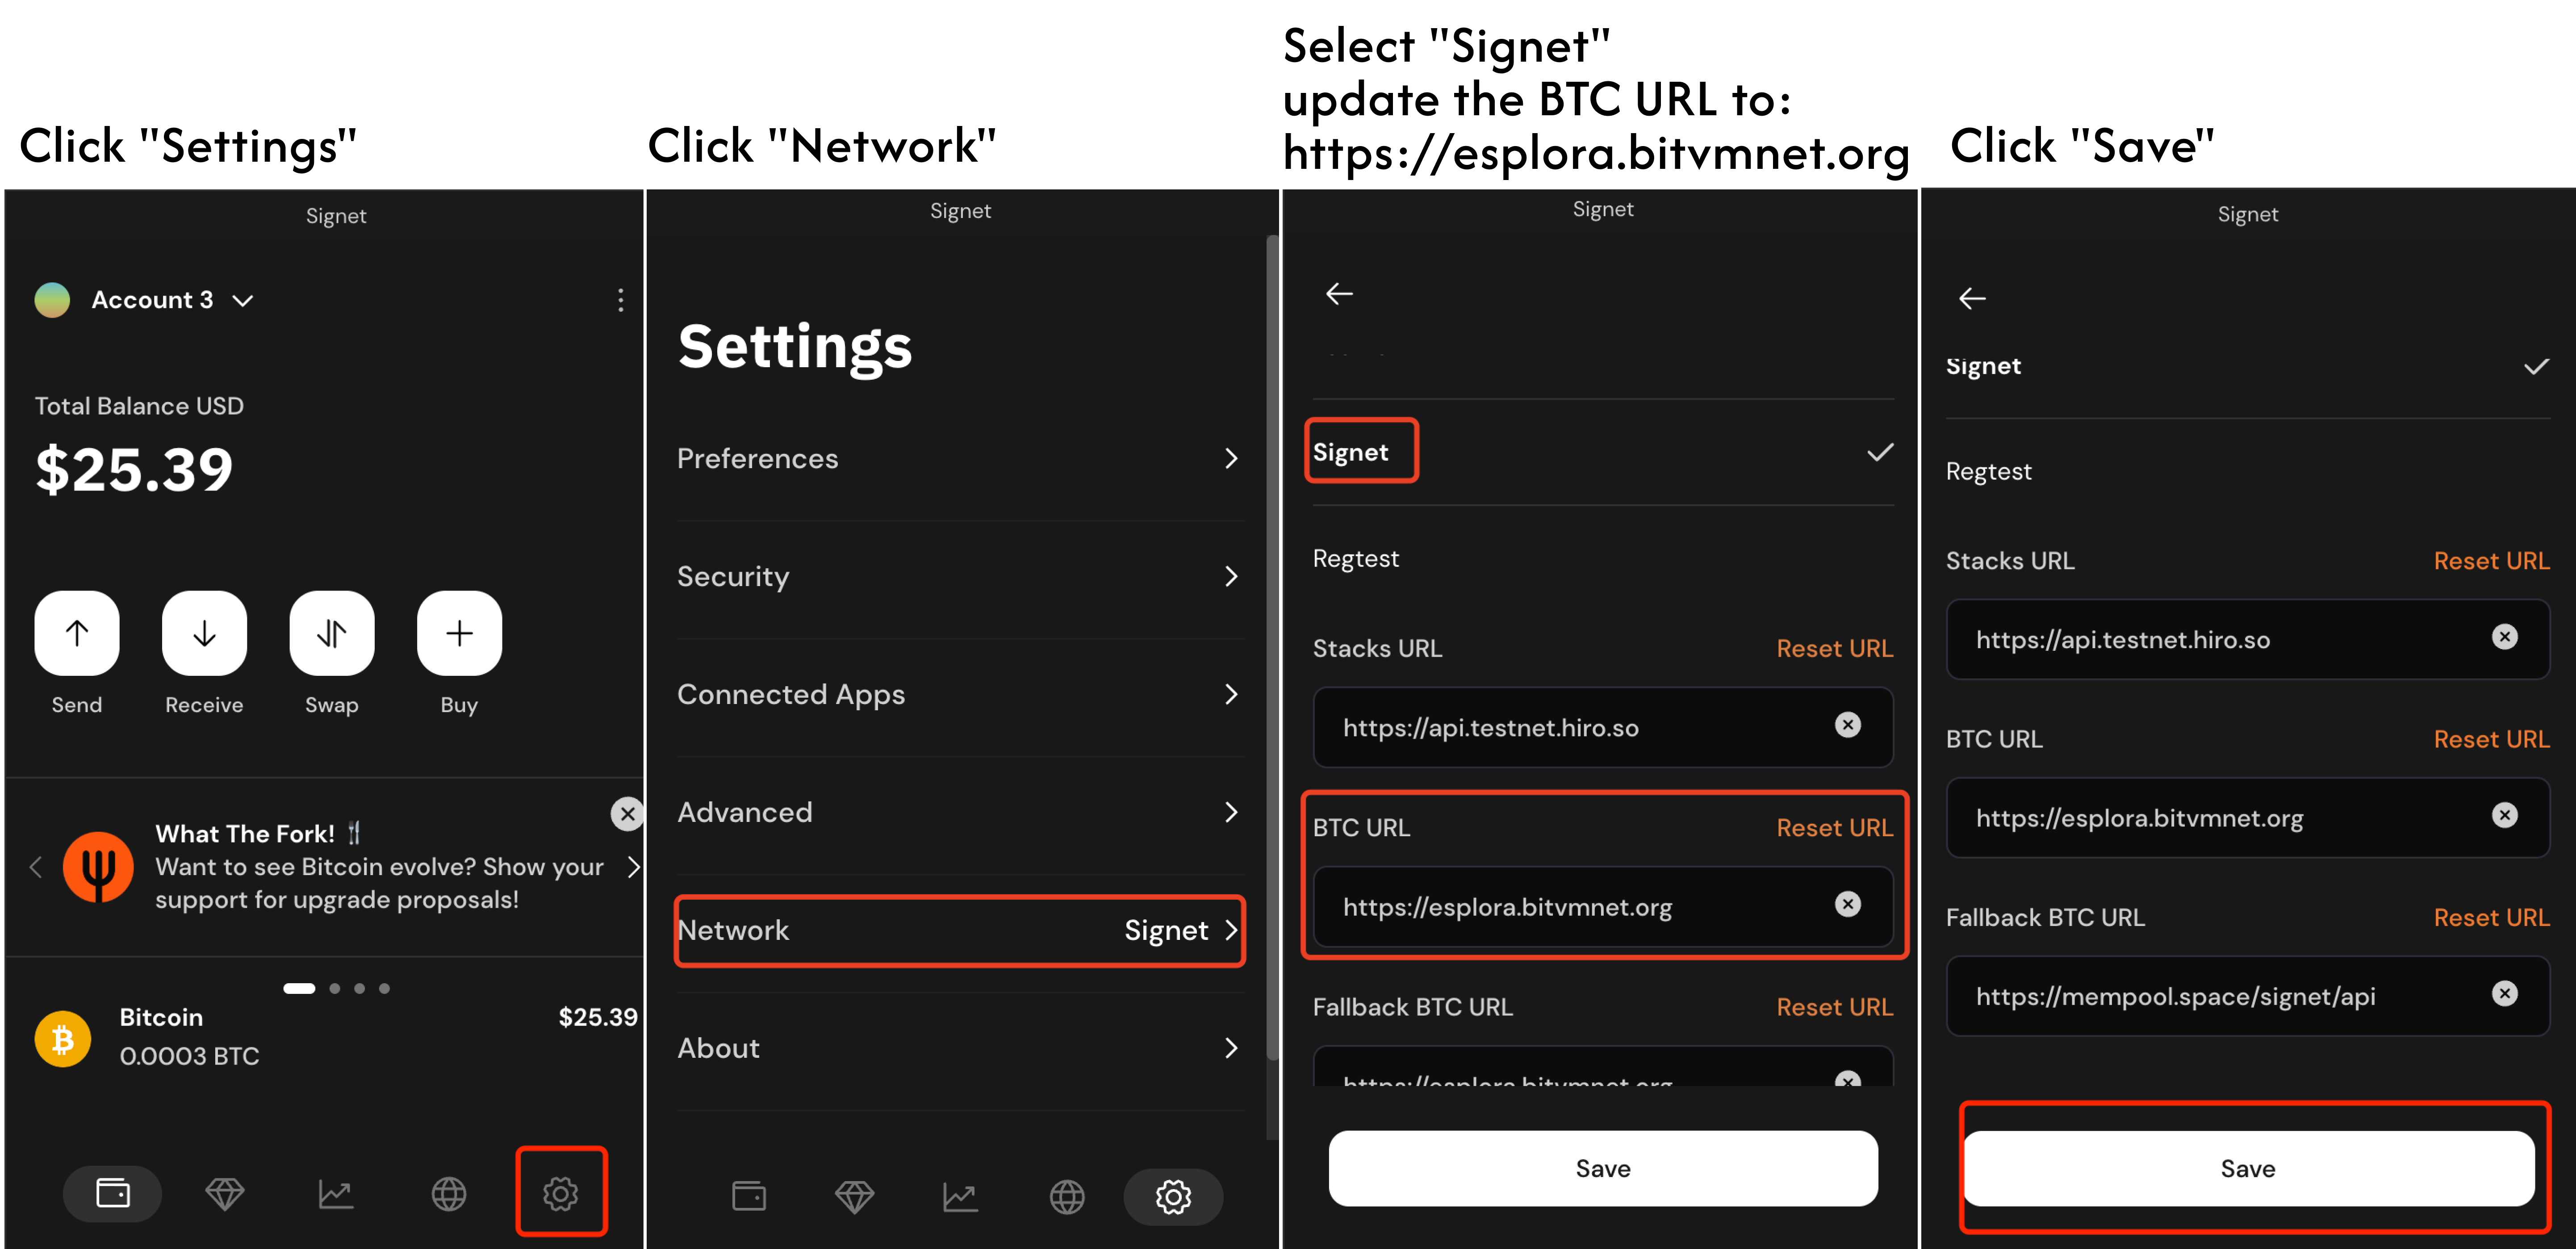
Step 1: Configure Xverse Wallet for BitVMNet
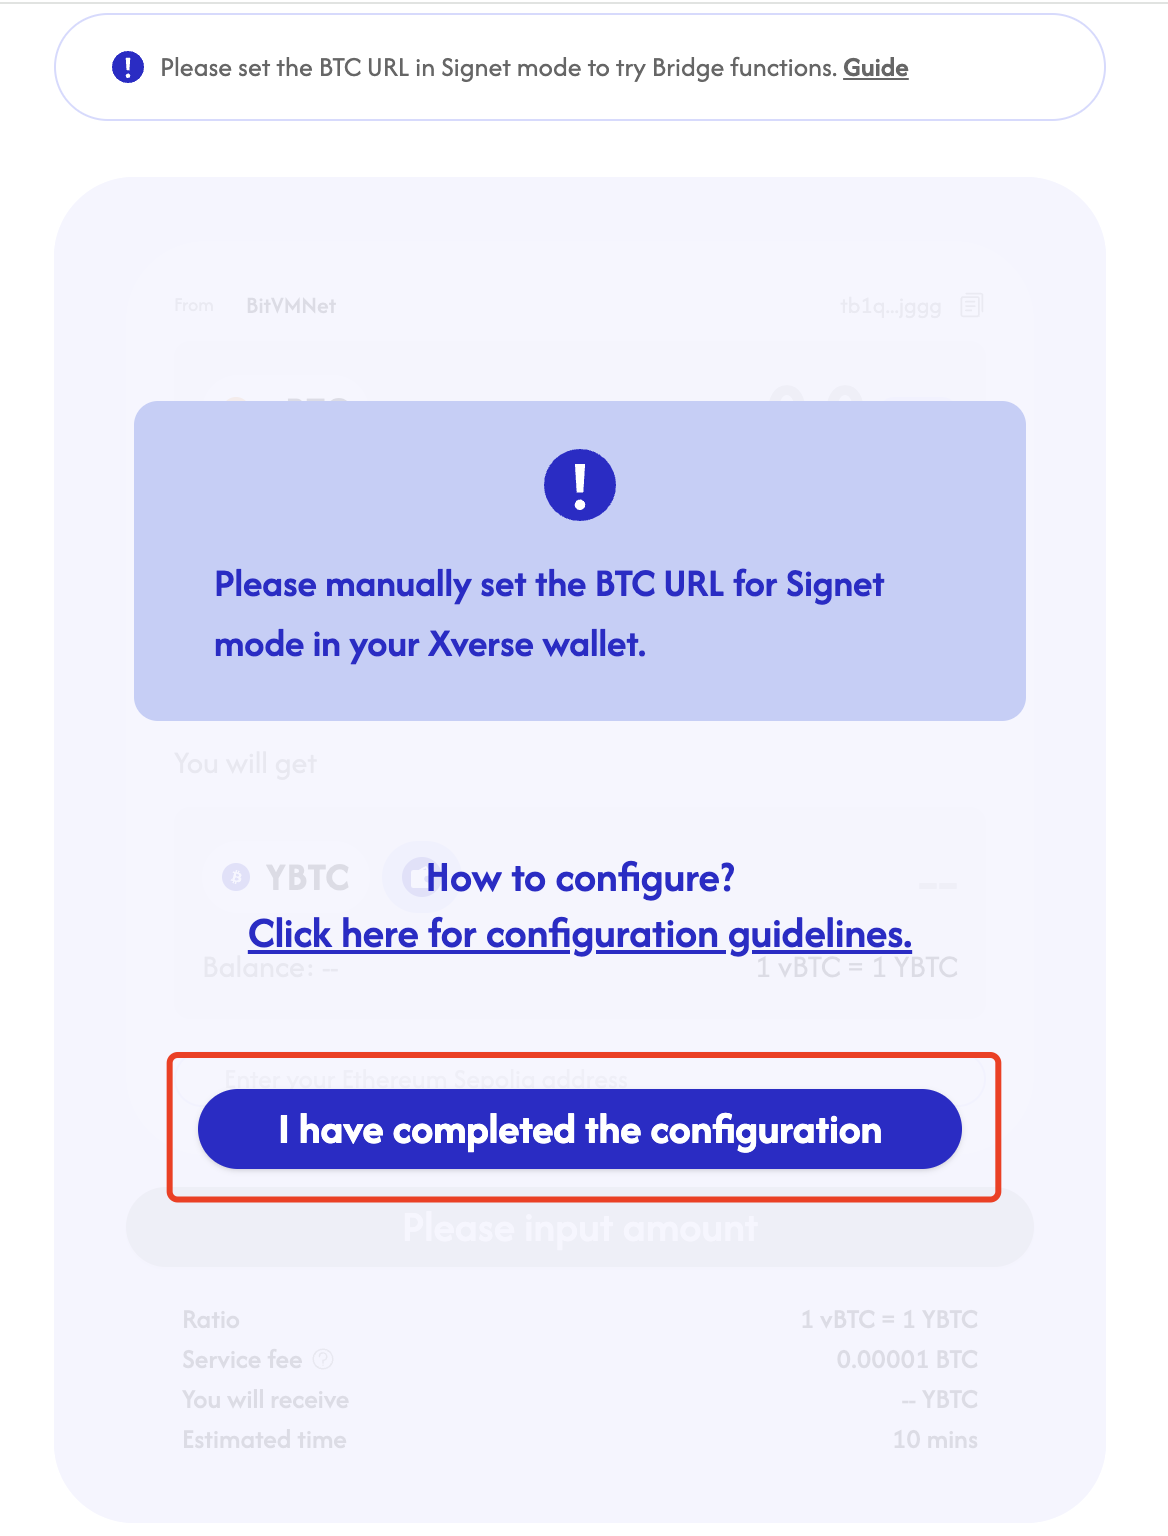
✅ Important: Manually set the Signet BTC URL in Xverse to:
https://esplora.bitvmnet.org
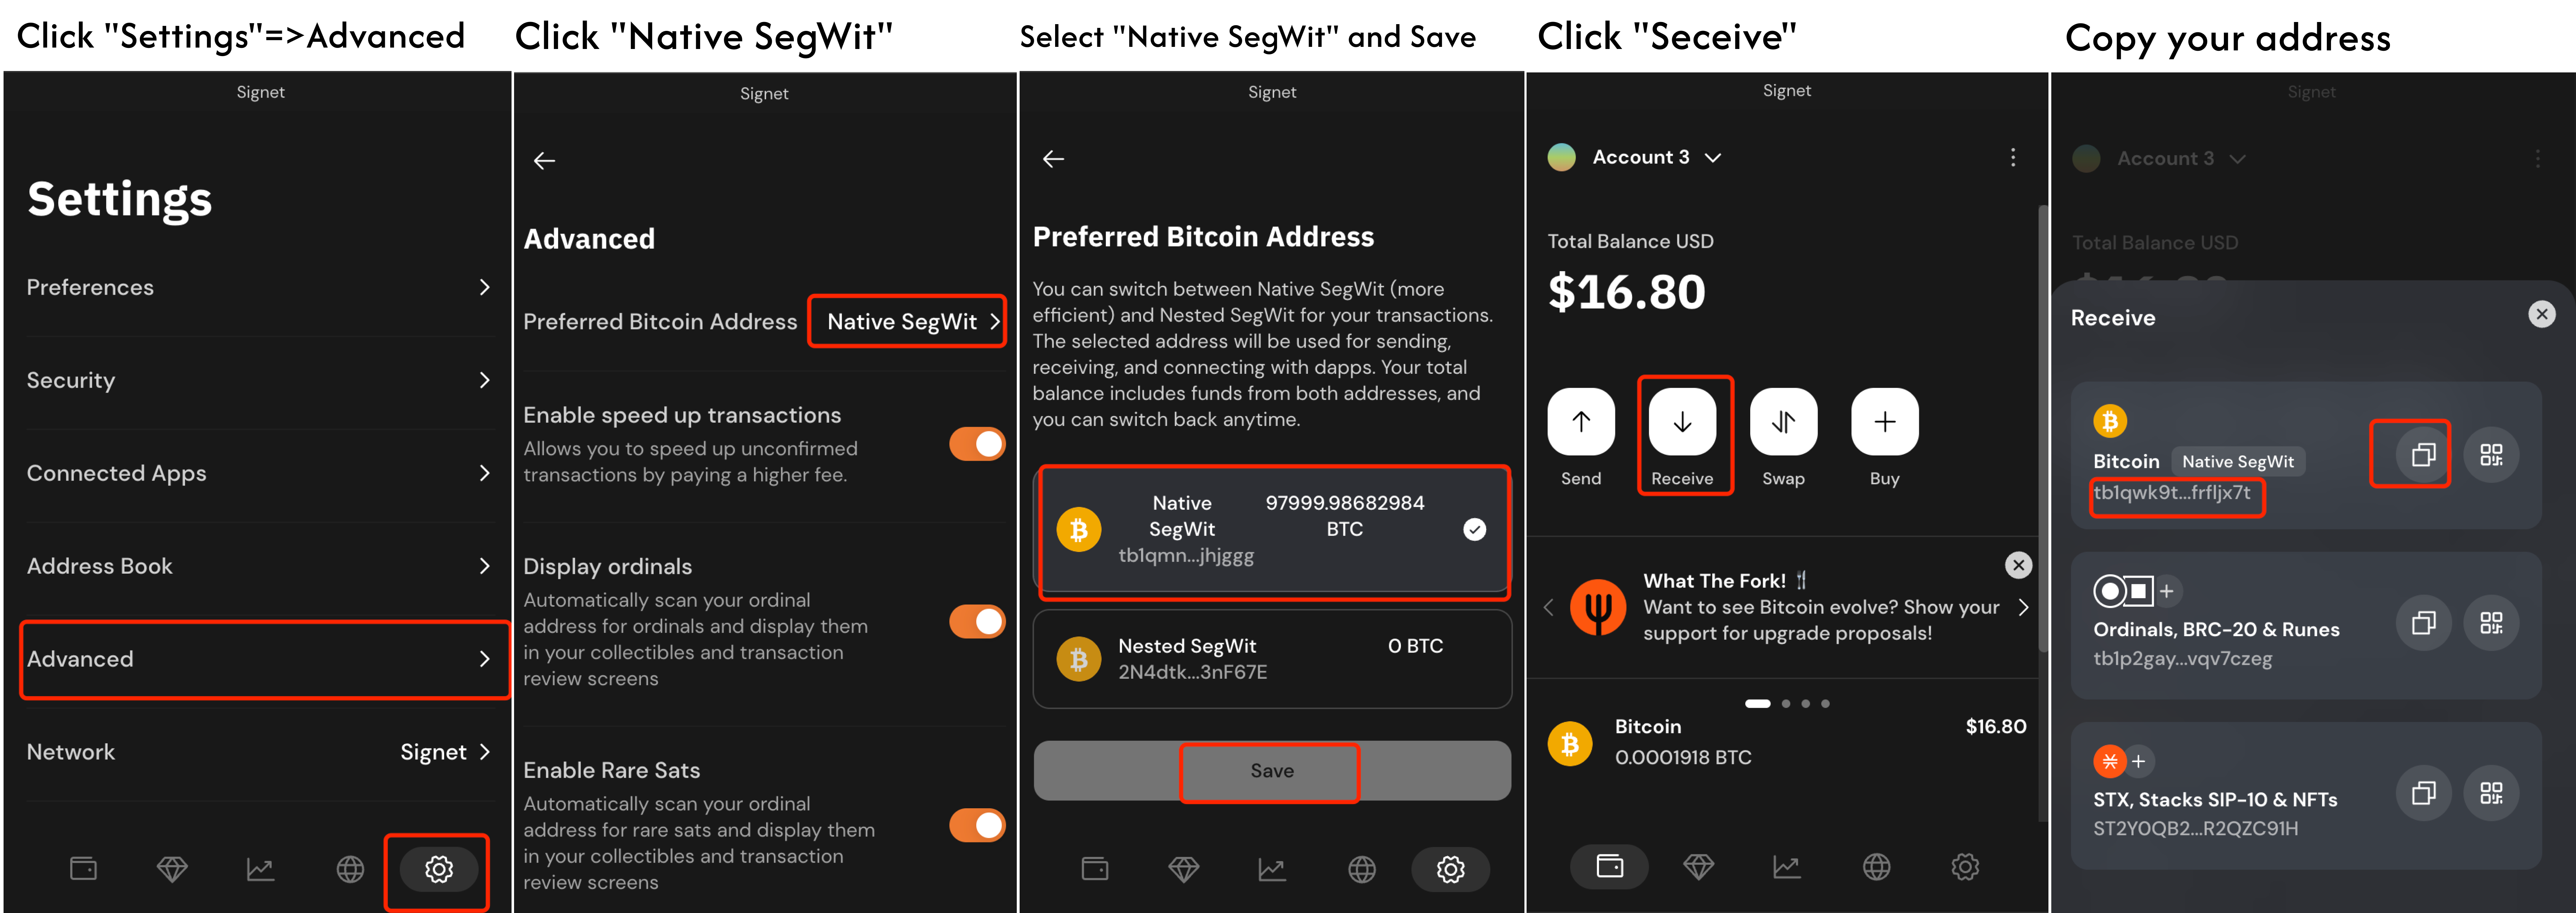
Step 2: Switch to Native SegWit Format in Xverse
In the Xverse wallet, ensure your address format is set to Native SegWit.
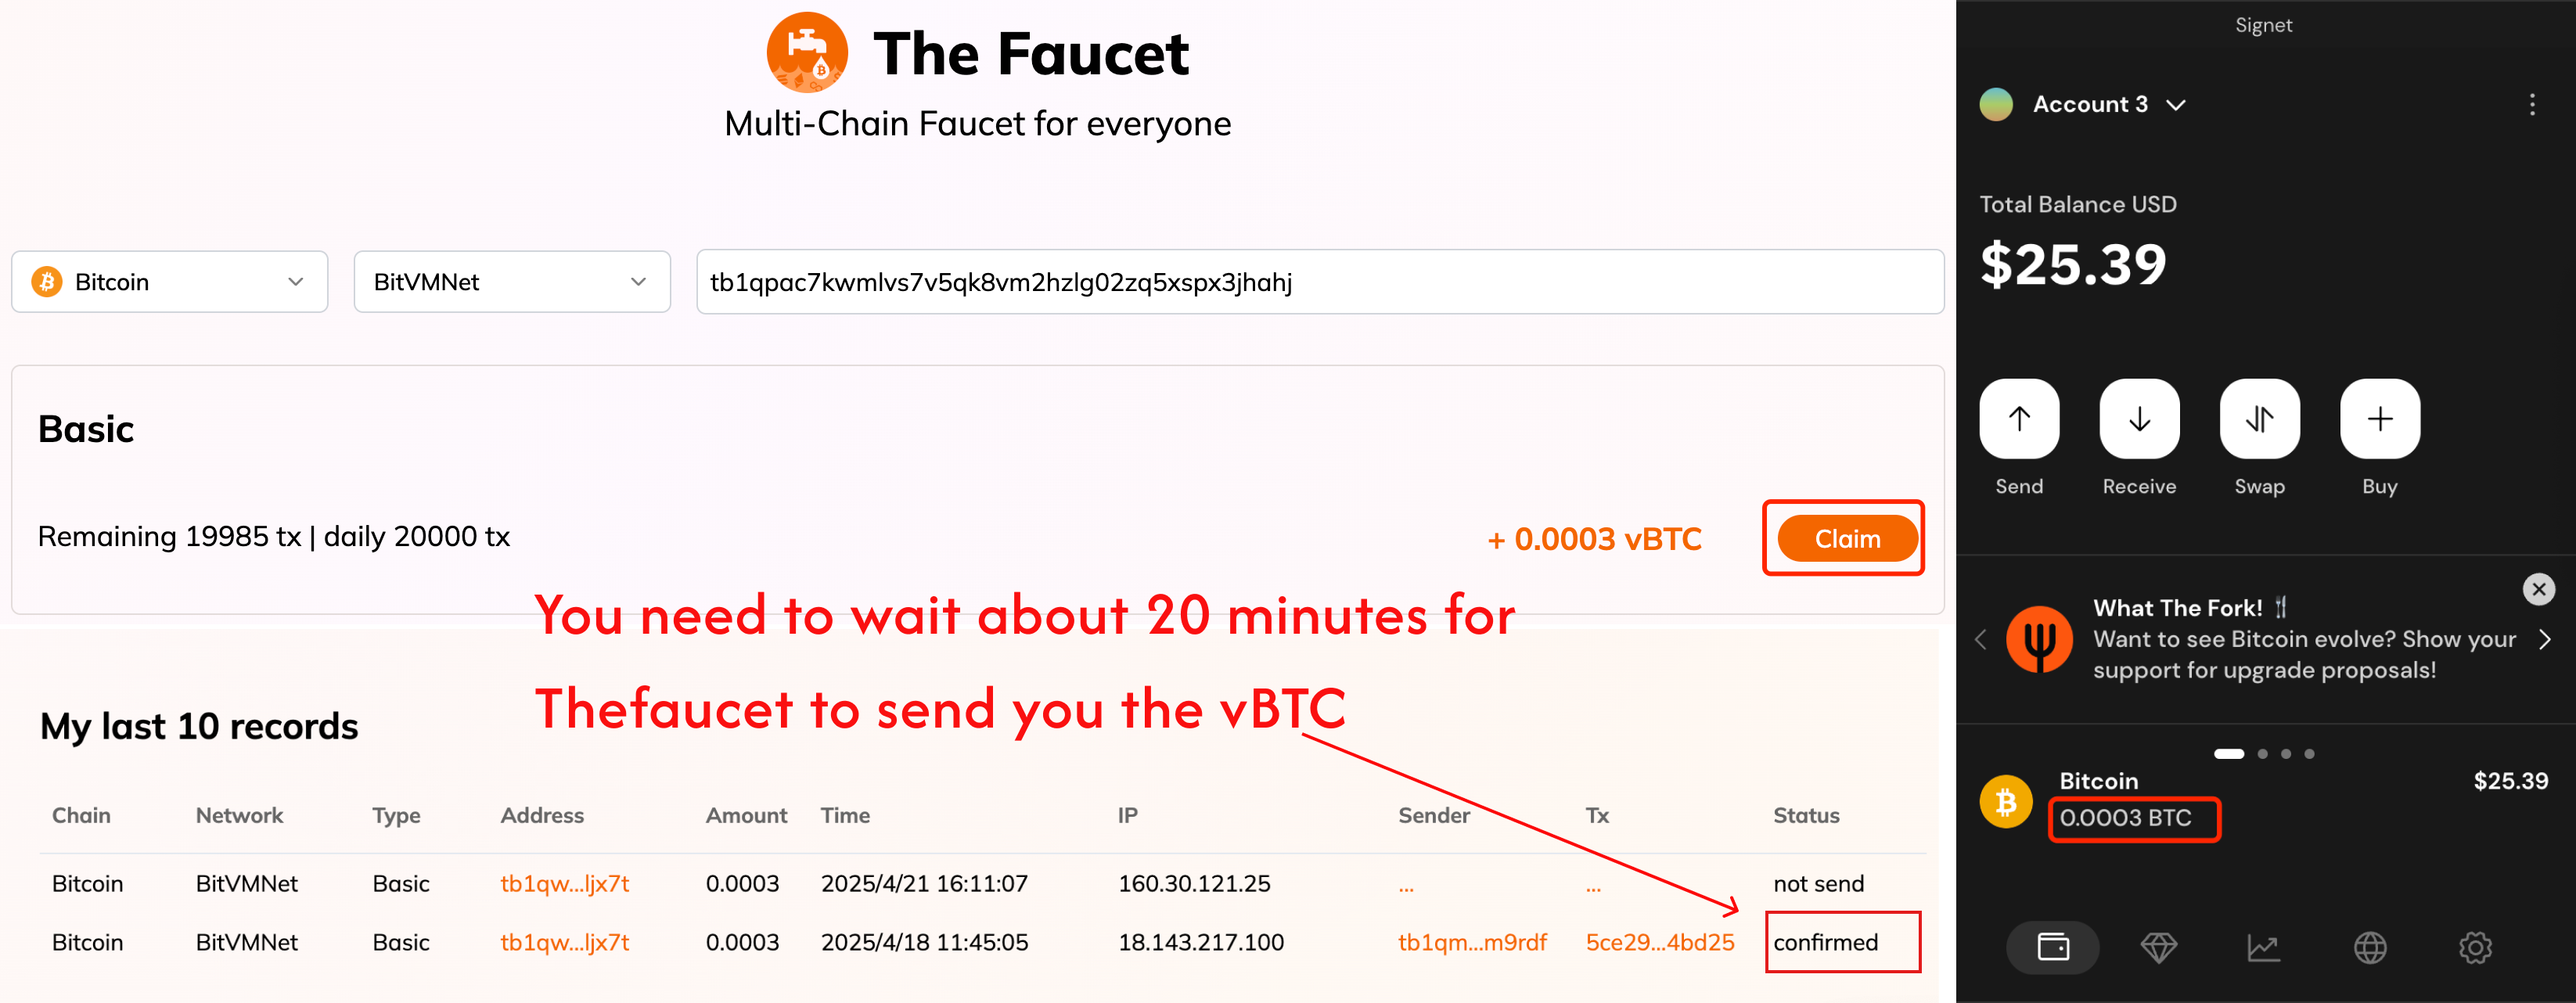
Step 3: Get BitVMNet BTC (vBTC) from TheFaucet
BitVMNet is an open Bitcoin Signet network supported by Bitlayer, designed for BitVM application development and testing.
BTC on BitVMNet is referred to as vBTC.
To get vBTC:
- Visit TheFaucet
- Enter a Bitcoin testnet address starting with
tb1qortb1p - Wait ~20 minutes for the faucet to send your vBTC
Once received, you can view your vBTC balance in Xverse.
Step 4: Verify BitVMNet Configuration in Xverse
Make sure your Xverse wallet is still using the correct Signet BTC URL:
https://esplora.bitvmnet.org
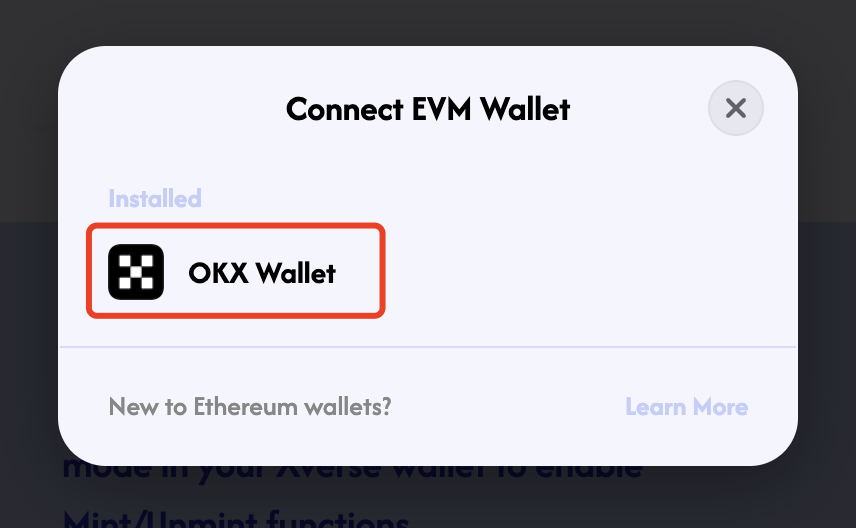
Step 5: Connect Your OKX Wallet
Connect your OKX Wallet to use Ethereum Sepolia or Monad Testnet as your destination network.
Step 6: Select Target Network
Choose either Ethereum Sepolia or Monad Testnet as your target network.
Step 7: Input Amount and Target Address
- Enter the amount of vBTC to bridge
- Confirm your EVM-compatible address
- Proceed to mint YBTC on the selected chain
Bridging YBTC Back to BitVMNet
Step 1: Switch Target Chain to BitVMNet
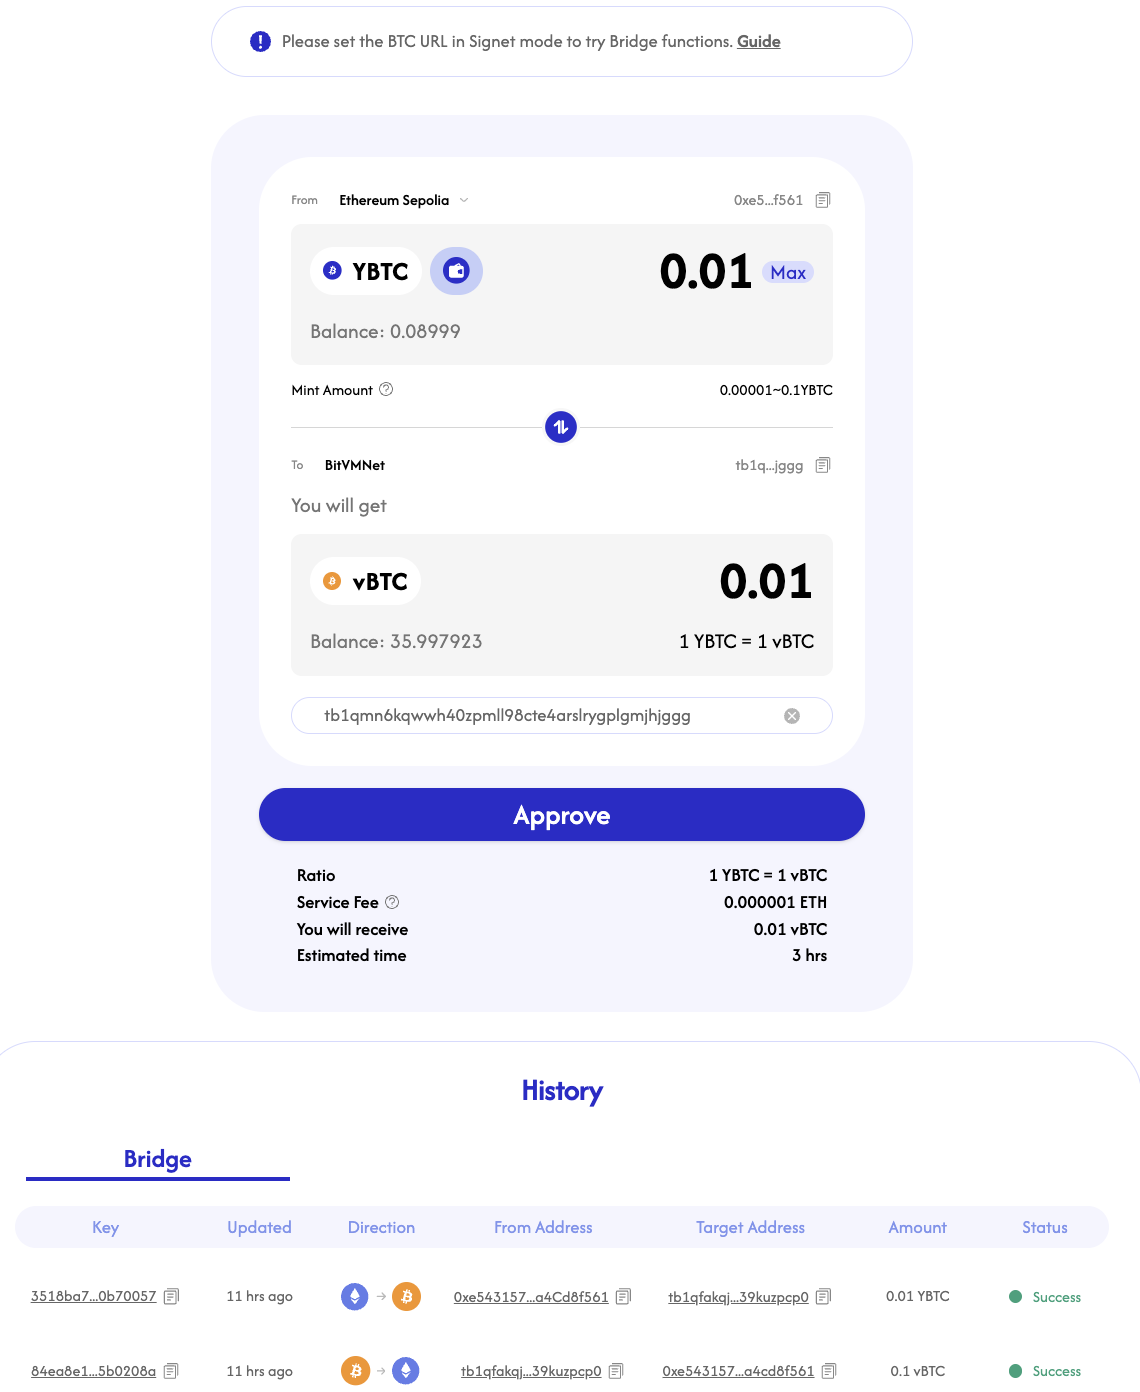
Step 2: Approve and Confirm
- Approve the transaction in your wallet
- Confirm to bridge your YBTC back to vBTC on BitVMNet
Quick Links
| Feature | Link |
|---|---|
| Get BitVMNet BTC (vBTC) | TheFaucet |
| Xverse Wallet Setup Guide | Setup Guide |
| BitVM Bridge Interface | BitVM Bridge |